latest articles

How To Use Multiple Facebook Accounts On A Single Android Or iPhone Device

Accessing multiple Facebook accounts on the computer is very easy — you just have to open a new browser or a private window to sign in to another Facebook account simultaneously. However, when it comes to the Androids and iPhones, the story changes. The 11” physical keyboard makes it easy to enter the user credentials, but for phones, we needed an easier way that would not want us to type the login information every time we want to access an additional Facebook account.


So, let’s see how we  can solve the issue at hand. There’s no trick using which one can configure more than one Facebook account in the official Facebook app, but there are two third-party apps, one each for Android and iPhone, using which you can configure multiple Facebook accounts and easily switch between them without signing out from one.


Friendcaster is the one we will be using for Android, while Friendly will help the iPhone users.


Friendcaster for Android :


Friendcaster  for Android is a Facebook app replacement which provides better user interface and features along with push notifications. The first Facebook account that you link to the app becomes your primary account. To add additional accounts, open the app preferences and tap on Accounts. Here you will be given the option to Add another account.


The app will ask for the Facebook username and password of the second account you would like to configure. After successful authentication, the app will ask you to grant all the permissions just like you did for the primary account.


You can then switch between the accounts easily from the app preferences and if you have a third or even fourth Facebook account you wish to add, Friendcaster provides that option as well. Apart from letting one configure multiple accounts, Friendcaster provides many additional features you might want to explore.


The app has a different presentation style and you might even like it better than the official app.


Friendly for iPhone :


iOS users who would like to configure more than one Facebook account for simultaneous use will find Friendly a very useful app. The app is easy to use and provides seamless access from all the accounts configured in it.


Download Link For FriendCaster Pro : http://mir.cr/ZL8QIEUI

Download Link For Friendly for Facebook : https://itunes.apple.com/in/app/friendly-for-facebook/id400169658?mt=8


Password To Unlock File : mahim37

Please Subscribe Us For More Updates.


Read more

Slidelock Brings Notifications to your Android Lockscreen in an iOS Style

There are quite a lot of lock screen replacement apps on the Play Store with the best one being Cover and Active Notifications. While most other lock screen replacement apps require heavy space to run in the background, there are some cool alternatives like Slidelock which are light and minimal.

SlideLock Android Apps on Google Play 600x399 Slidelock Brings Notifications to your Android Lockscreen in an iOS Style


Slidelock brings all notifications to your lock screen and shows you the notification content so you don’t need to unlock your screen to dismiss or view any of them. Its minimal interface is inspired from iOS 7.
To get started, you can download the app from the link at the bottom of this post after which you will be asked to enable notification access to the app without which it can not function.


Screenshot 2014 03 07 11 18 34 562x1000 Slidelock Brings Notifications to your Android Lockscreen in an iOS Style

Up next, you will be able to see a list of apps that exist in your device. You get to choose notifications from which app shouldn’t be shown on the lock screen.


Screenshot 2014 03 07 11 17 42 562x1000 Slidelock Brings Notifications to your Android Lockscreen in an iOS Style

Once you are done with that, you can customize the content displayed on the lock screen which includes some basic options like the date and time format. You can also choose to enable or disable sound on notifications.

Screenshot 2014 03 07 11 18 18 562x1000 Slidelock Brings Notifications to your Android Lockscreen in an iOS Style Screenshot 2014 03 07 11 18 22 562x1000 Slidelock Brings Notifications to your Android Lockscreen in an iOS Style

Once you start seeing notifications on your lock screen, you can swipe left to dismiss a notification, swipe right to view it in the app or tap on the top right button which dismisses all notifications on screen.


Screenshot 2014 03 06 12 39 11 562x1000 Slidelock Brings Notifications to your Android Lockscreen in an iOS Style

Apart from replacing your lock screen, the app also introduces notification banners, which looks something like Windows phone notifications. You can see an example of such notifications from the screenshots above. Tap on the banner to open the notification or swipe it away to dismiss. This does save your time as you don’t need to open the notification bar to access the notification.
You can also enable security lock like a PIN, pattern or face lock when you unlock the screen, however I don’t seem to find the option after the app has been configured once. Probably an update should fix that.


Download
Read more

Tutorial : Install Android Jelly Bean 4.3 in Ubuntu /Windows 7 /Mac via VirtualBox.


Want to run Android on your PC? 
The Android-x86 Project has ported Android to the x86 platform from ARM. Android-x86 can be installed on netbooks with supported hardware, but you can also install Android in VirtualBox.

Android can be run as just another virtual machine, like you would run a Windows or Linux virtual machine. This allows you to play with the Android interface and install apps in a full Android environment on your PC.

What You’ll Need :  
    1. Android-x86 ISO (Download Latest 1) - Official Website 
    2. Virtual Box (Official Website) (You May Download For Windows ,Mac ,Linex)
    3. Download Virtual Box For Windows
    4. Download Android -x86 4.3 Jelly Bean .ISO
Follow :
  • Install VirtualBox: Download and install VirtualBox if you don’t already have it installed.
  • Download an Android-x86 ISO: You can find the latest Android-x86 ISO files at Google Code. Download the latest one — currently Android 4.3.

Creating an Android Virtual Machine

You can now open VirtualBox and create a new virtual machine by clicking the New button. Go through the wizard and configure your virtual machine with the following settings:
  • Operating System: Linux – Linux 2.6
  • Memory Size: 512 MB
  • Hard Drive Size: 3 GB or More
STEP 1 :
  1. Open Virtual Box
  2. Click On "New"
  3. Enter The "Name" ; "Type" ; "Version"
  4. Click Next
STEP 2 :

Choose How Much RAM Space You Like To Give For Your Android Jelly Bean.
**You Must Give At Least 300+ MB**
**512 MB is Recommended & You Should**

STEP 3 :
 Create A Virtual Drive Image (Disk Space For Android 4.3)
 Click Next
**Give At least 2 GB To Android 4.3 **

STEP 4:
Now Click On Setting Button And Go To Storage And Add the Android x86 4.3 .iso in the Controller Root.

STEP 5:
Now Click On Start Button & Start The Programme...!

STEP 6 :
 Now You Can see A Boot Menu Either You Select "Run Android-x86 without installation".

If you Choose "Run Android-x86 without installation" Then You are ready to use Android Jelly Bean ....!

**But If You Want to Install It Choose "Install Android-x86 to Harddisk"

STEPS For Installing Android-x86 4.4
 STEP 1 : 

We’ll need to create a partition for the Android system. Select the Create/Modify partitions option and press Enter.

STEP 2 :
 Select the New option with your arrow keys and press Enter to create a new partition in the free space.

STEP 3 :
 Choose the Primary option and press Enter, then press Enter again to have the partition take up the entire size of the virtual disk you created.

STEP 4 :

Highlight the Bootable option and press Enter to make the partition bootable, then select the Write option and press Enter to write your changes to the virtual disk. You’ll have to type yes and press Enter to confirm writing the changes.


STEP 5 :
Activate the Quit option and you’ll go back to the Choose Partition screen.
This time, you’ll see the partition you created at the top of the screen. Select the partition and press Enter to install Android to it.

STEP 6 :
Select the ext3 file system, and then select Yes to format the partition.

STEP 7 :
Choose Yes to install the GRUB bootloader, and then select Yes to install the /system directory as read-write.

STEP 8 :
 **Once you’re done, you can remove the ISO file and reboot your virtual machine**

STEP 1 (Android-x86 4.3 Is Installed) :

Android should boot up like any other operating system would in your virtual machine. As with an Android smartphone or tablet, you’ll have to go through the setup process and optionally provide Google account details. Skip the Wi-Fi setup screen — Android will use your virtual machine’s standard Internet connection. 

 STEP 2 :
If your mouse cursor doesn’t work, click the Machine menu and select the Disable Mouse Integration option. Click inside the virtual machine and you’ll see the mouse cursor. Press the host key displayed at the bottom-right corner of the virtual machine window (default key: Right Ctrl) to release the mouse cursor from the virtual machine.

STEP 3 :

You’ll boot into a live Android environment, complete with Google apps like Gmail, Maps, and the Play Store for installing other apps.
Android is primarily designed for touch input, but it can also be used with a mouse and keyboard — this means that your computer’s mouse and keyboard can function as serviceable input devices. Just don’t try doing anything you need multi-touch for.


 **** TIP ****
If Internet Does't Work You Can Go Through The Settings >Network And Choose Your Preferred Network.

!!Done!!
Read more

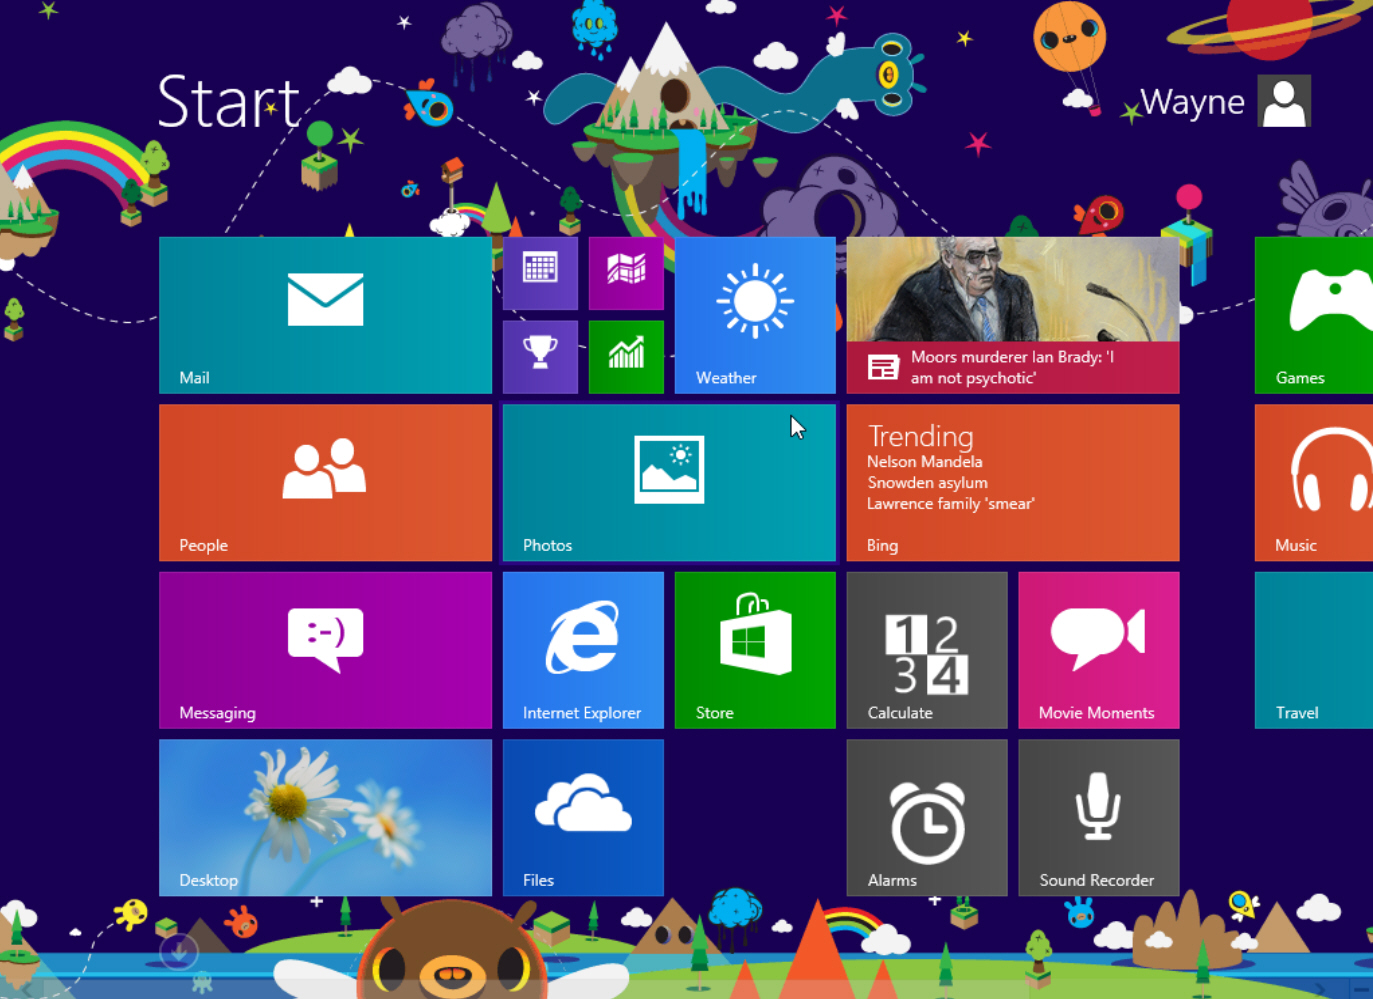
5 tips and secrets for Windows 8.1


Log in straight to the desktop
Plenty of people have little or no use for the Start screen. For them, the best new feature of Windows 8.1 is that it lets you go straight to the desktop when you log in. It's not immediately apparent how to do it, though. First, head to the desktop. Then right-click the taskbar and select Properties. From the screen that appears, click the Navigation tab, which is new to Windows 8.1. It's divided into two sections, Core navigation and Start screen, and it lets you customize many of the frustrating ways the Start screen works. Check the box next to "When I sign in or close all apps on a screen, go to the desktop instead of Start." From now on, when you log into Windows, you'll go straight to the desktop.
 
Turn the Start screen into a true app launcher
Windows 8's Start screen can be a monumental waste of space. Tiles may be nice eye candy but they take up so much space that you can't see all of your apps at a glance. You'll have to scroll sideways. There is, however, a way to make it a very useful app launcher. On the desktop right-click the taskbar and select Properties, then click the Navigation tab. In the Start screen section, check the box next to "Show the apps view automatically when I go to Start." From now on, when you go to the Start screen you'll see a list of all your apps rather than those big tiles. Click any app to run it.
 
Launch desktop apps faster
Windows 8 native apps are generally underpowered, and so you may well want to launch desktop apps such as Office far more frequently than Windows 8 apps. But they may be hidden among the myriad Windows 8 apps. There's a simple way to quickly find and launch desktop apps. On the desktop right-click the taskbar and select Properties, then click the Navigation tab. On the Start screen section, check the box next to "List desktop apps first in the Apps view when it's sorted by category." That way, your desktop apps will be right in frontof you when you need them. This is a particularly useful feature when combined with my previous tip about turning the Start screen into a true app launcher.
 
Get a real Start menu
Microsoft has been touting that it has restored the old Start button to Windows with Windows 8.1. That's not really true. It is true that there's now a button on the lower left-hand part of the screen. But it doesn't do what the Start button used to do, which is to let you launch apps, re-open files you've previously used, do a search, and more. Instead, it's just a task switcher that brings you to the Start screen wherever you are, or else switches to the desktop if you on the Start screen and you were just at the desktop.
For a real Start button you'll have to install software. There's plenty of software that does it. I recommend the free Start Menu 8 from IObit or ReviverSoft's free Start Menu Reviver. If you want to fork over $5, try Stardock's Start8.
 
Turn your lock screen into a slide show
Normally in Windows your lock screen is a static photo or image. But with Windows 8.1, you can have a slide show display on the lock screen. To do it, open the Charms bar by pressing the Windows key-C, then select Settings-->Change PC settings-->PC and devices-->Lock screen. Toward the bottom of the screen, click the switch "Play a slide show on the lock screen." That's all it takes.


Read more

Grand Theft Auto 5

 
Download Grand Theft Auto V PC Game Full Download Free 
Download PC Game Grand Theft Auto 5 Download Free
Download GTA 5 PC Free | Download GTA V PC Free 

 
Grand Theft Auto V | GTA V | GTA 5
Genre: Action
Release Date: 17 September 2013
Developer: Rockstar Games
Publisher: Rockstar Games

Grand Theft Auto 5 Features:

1. The GTA 5 Map is Huge

This isn’t that much of a shock considering that the GTA 5 map is essentially as big as the GTA 4 and Red Dead Redemption maps combined. Factor in all the vehicles and beautiful looking scenery and there is no surprise the game requires a massive install on the Xbox 360 and PS3.

2. Pilots Apply for GTA 5 Takeoff

This isn’t the first time GTA lets players fly a plane, but in GTA 5 gamers will find a bigger selection of planes and helicopters. In the GTA 5 gameplay footage we also see a lot of planes in the multiplayer setting, including military planes.

3. GTA 5 Is Packed Full of Games

If you need a break from the violence and exploration of GTA 5, take a trip to a tennis court of golf course and relax. Rockstar shows off two mini games that let players get a fix of Virtual Tennis and Tiger Woods without leaving the game. No word on if there is a Rockstar Table Tennis game hidden away too.

4. Mission Planning Offers Choices

Forget the structured missions of GTA 4 and other open world games which too often force players to perform stupid actions to move the plot along. In GTA 5, gamers can pick how to pull off heists and missions. While there will be limits, the trailer shows that players can go smart and quiet or loud and violent.

5. Customize Cars and Clothes

In GTA 5 players can customize a lot. From the looks of the GTA 5 trailer, gamers that spent hours customizing cars in Need for Speed games will have something to love as the game lets users customize wheels, paint and more. Players can also pick out clothes for a custom look, rather than picking between a suit and track pants.

6. Destructible Environments Look Amazing

The GTA 5 gameplay video shows a wall crumbling when the trio of miscreants smash an armored car into it. GTA games already offer some destruction in the environment, but it looks like GTA 5 ups the game considerably.

7. GTA 5 Multiplayer Should Be Crazy Fun

Rockstar teases GTA 5 multiplayer in a few seconds of the gameplay footage, promising a better look soon. Based on the teaser, GTA 5 multiplayer looks like a massive world full of players driving, flying and causing havoc. We can’t wait to see how it turns out.

8. 3 Players Means Triple the Fun

GTA 5 comes with three main protagonists and while you can’t kill your co-conspirators, you can jump between them at will when not in a mission. This allows players to jump between lives and settings to explore and have fun in the shoes of various people. During missions, players can switch when needed, to aid the other players, pulling off mor complicated plots than before.

9. Splurge or Gamble With Your Cash

When you take your part of the heist home you can spend it on weed and tattoos or choose to buy real estate and stocks. Investments can pay off, offering more cash for your needs, or tank like in real life. Rockstar calls fast cars and tattoos the smart investments.

10. Scuba Diving Offers a Bigger World

Once you’ve explored everything topside, take a dive to explore the depths of GTA 5 in a wetsuit. We’re sure there will be a few missions that involve diving, but players should also be able to go exploring in the ocean.

11. GTA 5, Now With Hunting

That’s right, no need to by Cabela’s Most Dangerous Hunts to get your fix of hunting on the Xbox 360 or PS3. Players can head to the wilderness outside of Los Santos to hunt, and as the trailer teases be hunted. We see a deer, but expect to see more in the wilderness.

12. GTA 5 Includes a Submarine

This isn’t part of the gameplay trailer, but it’s worth pointing out that there is a small submarine in GTA 5. With a lot of water to explore, we can’t wait to take the sub out for a spin around the bay.

13. Driving No Longer Looks Like Mario Kart

The driving in GTA 5 is brand new, and from the gameplay footage it should be more enjoyable. Driving in GTA 4 is worse than Mario Kart with drifts and sloppy steering throughout, Rockstar claims things are better and the video shows spectacular driving.

14. Shooting and Picking Weapons Won’t Suck

Rockstar delivers a new way to pick your weapon in GTA 5 and new shooting mechanics that look fluid and fun, rather than clunky and frustrating. Gamers can quickly switch between weapons with a new menu option and shooting looks vastly improved.

15. Bounty Hunting Side Missions

In GTA 5 players can pick up extra cash playing bounty hunter. The trailer shows Trevor cashing in a bounty at a trailer home in the middle of a desert. This should deliver fun diversions from the main heists


Grand Theft Auto V Minimum System Requirements:
Operating System: Windows XP SP3 or Windows Vista SP1 or Windows 7 SP1
Processor: Intel Core 2 Duo 2.6 GHz or equivalent
Memory: 2 GB RAM
Video Card: 512MB Nvidia 7900 or 512MB ATI X1900
Hard Disk Space: 35 GB free space

DirectX: 10.0

 Screenshots 


Download

If you like this post please subscribe us for more updates.
Thank you for visiting.
Read more

Remember Me

Download-Remember Me 2013-Download-Free-PC Download Free Remember Me 2013 PC Download Free Download Remember Me 2013 Download Free Game For PC
Minimum System Requirements:
* Operating System: Windows XP / Windows Vista / Windows 7
* Processor: Intel Dual Core @ 2.8 GHz or higher
* Memory: 1 GB of RAM (2 GB for Vista & Win 7 )
* Graphics Card: 256 MB (Nvidia GeForce 7900) Pixel Shader 3.0
* Hard Disk: 9 GB free disk space
* Sound Card DirectX compatible
* DirectX 10

ScreenShots


4 GB Download links:

Rapidgator Download Links:
http://ncrypt.in/folder-2uYVhneE

Uploaded Download Links:
http://ncrypt.in/folder-eMxtq2D1

1 GB Download Links:

BillionUploads Download Links:
http://ncrypt.in/folder-m1x11AuE

UptoBox Download Links:
http://ncrypt.in/folder-NGRM1h7d

CloudZer Download Links:
http://ncrypt.in/folder-umJU6y1F

HugeFiles Download Links:
http://ncrypt.in/folder-aBrBGrDJ

Putlocker Download links:
http://ncrypt.in/folder-8ftUsFsE

Password: Click Here!!

Installation Notes:
1. Unpack the release & Mount.
2. Install.
3. Install and copy the cracked contents to game install dir.
4. Play the game.
Read more

Assassin’s Creed Liberation HD

 
Download Assassin's Creed Liberation HD Download PC Game
Assassin's Creed Liberation HD Free Download Full Version PC Game

Assassin’s Creed Liberation HD, the striking chapter of the pre-American Revolution Assassin’s Creed saga which arrives for the first time on HD consoles and PC. With improved gameplay, deeper story and HD graphics makes Liberation an immersive and full Assassin’s Creed experience.

Game Information:
Title: Assassin’s Creed® Liberation HD
Genre: Action, Adventure
Developer: Ubisoft Sofia
Publisher: Ubisoft
Release Date: 15 Jan 2014
Languages: English, French, Italian, German, Spanish
Size: 3.27 GB

Minimum System Requirements:
* Operating System: Windows XP / Windows Vista / Windows 7 / 8
* Processor: Intel Core i5 @ 2.5 GHz or higher
* Memory: 2 GB of RAM (4 GB for Vista & Win 7 / 8)
* Graphics Card: 1 GB (Nvidia 8800 GT) Pixel Shader 3.0
* Hard Disk: 4 GB free disk space
* Sound Card DirectX® 9.0c compatible
* DirectX® 9.0

ScreenShots


BillionUploads Download Links:
http://ncrypt.in/folder-YZyqs9IZ

HugeFiles Download Links:
http://ncrypt.in/folder-lFribvtf

UptoBox Download Links:
http://ncrypt.in/folder-D4sfRI2H

CloudZer Download Links:
http://ncrypt.in/folder-tq1CI9wQ

Putlocker Download links:
http://ncrypt.in/folder-uhGn6DMb


Crack Only Download:
http://ncrypt.in/folder-cBKA6yq2

Installation Notes:
1. Unrar the release.
2. Mount or burn image.
3. Install the game.
4. Copy the cracked content into the main install folder and overwrite.
5. Block the game in your firewall and mark our cracked content as secure/trusted in your antivirus program.
6. Play the game.


If you like this post please like & subscribe us.
Read more

Stay Protected From Every Type Of Malware With Avast Free Antivirus


Stay Protected From Every Type Of Malware With Avast Free Antivirus 

How Can It Be Free?

Great question — avast!, like some of the other popular free antivirus programs such as Avira and AVG, uses its free program as a promotion to get you to like the product enough to upgrade to a premium version. The free version in itself is just as effective and includes excellent antivirus detection technology and real-time protection from all types of malware. However, if you’re looking for more than just the essential protection from avast!, you’ll want to upgrade.

Key Features & Highlights

  • Background/real-time scanning
  • Scheduling and automatic definition updates
  • Hands-off, set-and-forget usage
  • Intuitive user interface
  • Bloatware-free installation
  • Light impact on system resources

Additional Useful Features

  • Software Updater (manual)
  • Browser Cleanup
  • Remote Assistance (for both parties)
  • Optional Browser Extension

What You Can Expect From avast!

)Immediately you’ll appreciate the clean, user-friendly interface which allows for easy navigation around the program to adjust settings and program functions. When avast! is scanning your computer, you won’t even know it. I ran a Quick Scan while writing this article with 12 tabs open in Chrome, and running the other following programs all at once: Windows Live Writer, Evernote, Greenshot, and RIOT in combination with 91 other background processes.
0.1 Task manager avast resources   Stay Protected From Every Type Of Malware With Avast Free Antivirus
So don’t worry about running avast! on a computer with fewer resources to offer. In fact, I will go as far to say that avast! is the perfect antivirus for those small computers with less RAM and small processors. Although there are some adjustments you will want to make initially, which I’ll cover throughout the article, there isn’t any reason you will need to visit them after setting them once, unless you’re the kind of person who likes to explore programs and tinker around with the details, which avast! allows you to do as well.

Downloading & Installing avast!

Unless you’re starting out with a new computer and using a website such as Ninite.com, go to avast.com, click the blue “Go To Download” button and click the first “Download” button under “Essential avast! Free Antivirus”.
1 Avast Download options Free   Stay Protected From Every Type Of Malware With Avast Free Antivirus
When installing any program, I always recommend choosing the “custom” or “advanced” installation option, rather than the “regular” or “recommended” installation.
2 Avast Installation Custom   Stay Protected From Every Type Of Malware With Avast Free Antivirus
Getting in the habit of doing this will all programs will help keep any unwanted tag-along software off your computer and ensure you know exactly what you’re installing. Often times, programs, avast! included, come with additional features or programs such as “avast! Remote Assistance” or “SecureLine”. These are features within avast!, that unless you intend to pay for them, you won’t be able to use. So if you don’t plan on using these, you can simply uncheck the box.
3 Avast Installation choose compenents to install   Stay Protected From Every Type Of Malware With Avast Free Antivirus
Another option you may or may not want is the “Browser protection” feature which installs an extension into your browser. If you already use a similar tool, such as Web Of Trust, and are happy with it, you can uncheck this option as well.
4 Avast Browser Protection Plugin Chrome   Stay Protected From Every Type Of Malware With Avast Free Antivirus
The rest of the installation is easy and straightforward. Avast! takes it upon itself to make a restore point during the installation, which is always nice.
IMPORTANT: As with any antivirus software, be sure you have uninstalled any previous antivirus software prior to starting the avast! installation. The only exception being in Windows 8, where Windows Defender will automatically disable itself and display a prompt asking if you’d like to allow avast! to run.
5 Allow Avast   Stay Protected From Every Type Of Malware With Avast Free Antivirus

Registering For avast!

6 Avast Registration Button   Stay Protected From Every Type Of Malware With Avast Free Antivirus
After installing, avast! will automatically run the initial scan, although you will need to set up a schedule scan to accompany the real-time protection. Before you do that though, you must register in order to use avast! for free, which is a quick and painless process.
7 Avast Register Enter information   Stay Protected From Every Type Of Malware With Avast Free Antivirus
8 Avast Registration Select standard   Stay Protected From Every Type Of Malware With Avast Free Antivirus
During this time you may be given the option to upgrade, just continue with the normal registration.
9 Avast Registration stay with basic   Stay Protected From Every Type Of Malware With Avast Free Antivirus
It can be easy to, in the motion of things, accidentally click the “green button” instead of a lighter colored or smaller button and wonder why you’re being asked to pay for a free program. Just remember that avast! is free, but they have to make their money somehow in order to supply a free antivirus app to happy users like us.
10 Avast upgrades   Stay Protected From Every Type Of Malware With Avast Free Antivirus
On that note, avast! is really not too bad about upgrade prompts. There’s a banner at the bottom of some windows, and some features have an unobtrusive upgrade button for additional options, but other than that, it’s not nearly as bad as some of the other free antiviruses with pop-up windows every time you open the program. There will be the occasional pop-up, but it never has become a nuisance to me. Just click the “X” and go about your business.
10.1 Avast upgrades popup   Stay Protected From Every Type Of Malware With Avast Free Antivirus

Familiarizing With Features And Settings

You’ll quickly find that avast! has an awesome, easy-to-use user interface. The collapsible sidebar allows you to quickly navigate through the different sections of the program.
11 Avast Home Collapse Sidebar   Stay Protected From Every Type Of Malware With Avast Free Antivirus

Status Page

The Status page displays the basic information such as whether everything is up to date and if the File System, Mail and Web shields are active. These are all turned on by default, but if you’d like to adjust their individual settings, you can do so via the Settings button and then clicking “Active Protection”. There are four customizable squares on the Status page that you can right click and link to various parts of the program for quick access.
12 Avast Home Change remove shortcut   Stay Protected From Every Type Of Malware With Avast Free Antivirus

Scan Page

13.1 Avast Scan Options   Stay Protected From Every Type Of Malware With Avast Free Antivirus
There are several types of scans you can choose and run manually: quick scan, full system scan, removable media scan, select folder scan, and boot-time scan. With each one you select, there is also a settings link (blue) that allows you to access scheduling, sensitivity, scan areas and file types, exclusions, additional actions, and more.
Most of the default settings will suffice, although you will need to set up a scheduled scan. Refer to the image below for some brief instructions. In the bottom right corner of the Scan page there are links to the Quarantine (Virus Chest), scan history and a custom scan.
14.1 Avast Schedule Scan Settings   Stay Protected From Every Type Of Malware With Avast Free Antivirus

Tools

15 Avast Tools   Stay Protected From Every Type Of Malware With Avast Free Antivirus
By hovering your cursor over the Tools link, a menu of additional features is displayed. Such tools include Software Updater, Browser Cleanup and Rescue Disk. Note that in the screenshot above, SecureLine and AccessAnywhere are also present, but those will cost you in order to take advantage of them (you may remember me mentioning in the beginning that you can choose to uncheck those features if you don’t intend to use them).
Software Updater (not automatic)
16 Avast Tools Software Updater   Stay Protected From Every Type Of Malware With Avast Free Antivirus
Browser Cleanup
17 Avast Tools Browser Cleanup   Stay Protected From Every Type Of Malware With Avast Free Antivirus
Rescue Disk
18 Avast Tools Rescue Disk   Stay Protected From Every Type Of Malware With Avast Free Antivirus

My Devices Page

19 Avast My Devices   Stay Protected From Every Type Of Malware With Avast Free Antivirus
In order to access your devices, you must first log in, and if you haven’t created a password for your avast! account, you’ll need to do that. Afterwards though, you’ll be able to see all the different devices you have avast! installed on. Notice that avast! isn’t available solely on PC — there is also an avast! Android app, which is one of the 4 must-install apps for your new Android phone. If you’re a Mac user, there is a compatible version available for you as well.

Help Pages

20 Avast Help   Stay Protected From Every Type Of Malware With Avast Free Antivirus
Hovering over the “Help” button displays a menu with pages for Support, Feedback, Remote Assistance, About, and Tutorial. As someone who does a bit of technical support, Remote Assistance is an excellent feature that is easy to use without having to tell a client to go to a website and download a program.
21 avast Help remote asssistance   Stay Protected From Every Type Of Malware With Avast Free Antivirus

Stats Pages

22 Avast Stats Your Stats   Stay Protected From Every Type Of Malware With Avast Free Antivirus
The next button down opens up stats for avast!, both personal and global. From the “Your Stats” button, you can view realtime data, historical data, and component status (pictured below).
23 Avast Stats Component status   Stay Protected From Every Type Of Malware With Avast Free Antivirus
Global stats cover Security Statistics, such as Streaming Updates, Infected Domains and Prevented Attacks, and User Statistics including Active Devices, OS Versions and User Demographics.
24 Avast Stats Global Stats   Stay Protected From Every Type Of Malware With Avast Free Antivirus

Settings

The second-to-last button in the sidebar is the settings. Here you can adjust numerous features and set avast! exactly how you would like in the following areas of General, Active Protection, Antivirus, Appearance, Updates, Registration, Tools, and Troubleshooting. Some (not all) of the settings you’ll probably find most useful are highlighted below.
General Settings
25 Avast Settings General   Stay Protected From Every Type Of Malware With Avast Free Antivirus
Here you will be able to set a password to protect various parts of avast!, toggle Silent/Gaming Mode, manage some maintenance settings and backup/restore previous settings.
Active Protection
25.1 Avast Settings Active Protection   Stay Protected From Every Type Of Malware With Avast Free Antivirus
Shield status was mentioned towards the beginning of the article when covering the Status page. This is where you can adjust the File System, Mail and Web shields individually. The defaults for these should suffice, but should you want to explore their settings more, this is where you can do that.
Antivirus
25.2 Avast Settings Antivirus1   Stay Protected From Every Type Of Malware With Avast Free Antivirus
A new feature in avast! Free Antivirus is Hardened Mode (pictured above). Hardened Mode is unchecked by default, but created in mind of inexperienced users who could get themselves into trouble and for administrators who want to lock down settings while still enabling accounts. This mode only allows for known, whitelisted software to install, based the avast! community database.
Appearance
The defaults here all are likely what you’ll want. However, there is one setting that will concern most users and is also slightly difficult to find — the sound. You will notice that avast! has audible alerts and this can be annoying to many. The confusing thing is that the setting to adjust this is under Appearance.
26 Avast Settings Appearance Sounds   Stay Protected From Every Type Of Malware With Avast Free Antivirus
“Sounds” will be second in line under “Language” and there will be a check box to toggle sounds as well as a dropdown menu titled “Sound settings” that will be collapsed by default. I don’t recommend disabling all sounds. Instead what I recommend is unchecking the “Scan complete” and “Automatic update” check boxes, and leaving the other three checked. If you ever need to change it, it’s always a few clicks away and now you know where to go. You can also disable voiceover sounds if you don’t want to hear the woman’s voice.
Update
25.4 Avast Settings Update 1   Stay Protected From Every Type Of Malware With Avast Free Antivirus
By default, avast! updates virus definitions on its own without you needing to set anything. For program version updates, the default is set to “ask when an update is available”, but this can be changed to automatic as well.
25.4 Avast Settings Update 2   Stay Protected From Every Type Of Malware With Avast Free Antivirus
Auto-update will occur every 240 minutes, but you can adjust this as well. And remember those ad popups mentioned earlier in the article? Those can be prevented by unchecking “Show notification box after automatic update.” The trade-off for this is that any sort of notification of when avast! is updated is also disabled.
25.4 Avast Settings Update 31   Stay Protected From Every Type Of Malware With Avast Free Antivirus

Browser Protection

27 Avast Browser Protection Plugin   Stay Protected From Every Type Of Malware With Avast Free Antivirus
Paired with avast!’s real-time scanning is an optional browser extension to protect you from malicious websites. As stated earlier, this is a very similar tool to Web Of Trust, which is probably the number one browser extension for safeguarding against harmful websites. The extension comes with an intuitive interface, which is triggered when you click the avast! logo button in the browser. The settings are easy to adjust too. For more settings, there’s a convenient button in the bottom right corner of the extension sidebar.
28 Avast Browser Protection Plugin Settings   Stay Protected From Every Type Of Malware With Avast Free Antivirus

Final Thoughts

Since Microsoft Security Essentials got some negative feedback on missing infections, avast! has become my antivirus of choice, as well as what I recommend to anyone who asks. Coupling its very reputable presence among security experts with an intuitive design, what more could you ask for?
Do you use avast! or do you prefer another antivirus program?
Download: avast! Free Antivirus
Read more